
A leaking pipe joint can quickly turn from a minor annoyance into a major headache. When you notice water seeping from your pipes, you need to act fast to prevent costly water damage to your home.
Understanding how to fix a leaking pipe joint will help you assess the situation and take appropriate action. As San Francisco’s expert plumber, Works Plumbing helps Bay Area homeowners resolve plumbing emergencies every day. In this guide, Works Plumbing will explain how to fix a leaking pipe joint and how to determine whether or not you have a leak.
How To Tell When You Have a Leaking Pipe Joint
Water leaks often hide behind walls or under floors, making early detection crucial. Learning to spot the signs of a leaking pipe joint can prevent extensive damage to your home’s structure. Professional plumbers recommend regular inspections of visible pipes and joints to catch problems early.
Look for these common warning signs that indicate a leaking pipe joint in your home.
Unexplained Moisture or Water Spots
Dark patches on walls, ceilings, or floors often reveal hidden pipe leaks. You might notice peeling paint, warped wood, or discolored drywall near the affected area. These spots typically feel damp to the touch and may grow larger over time.
The severity of water spots often indicates how long the leak has been present. Regular monitoring of these areas helps track whether the problem is worsening.
Musty Odors and Mold Growth
Persistent dampness from leaking joints creates ideal conditions for mold growth. If you detect musty smells or see mold forming, investigate nearby plumbing joints.
Mold can appear in various colors, from black to green to white, often indicating a long-term moisture problem. The presence of mold signals a plumbing issue and can create health concerns for your household.
Increased Water Bills
When your utility bills spike, you need to start looking into how to fix a leaking pipe joint. An unexplained spike in your water bill often signals hidden leaks.
Monitor your monthly usage to catch potential problems early. Even small joint leaks can waste hundreds of gallons of water per month. You can check your meter readings during periods when no water is being used to confirm if water is leaking somewhere in your system.
Decreased Water Pressure
When pipe joints leak, you might experience reduced water pressure throughout your San Francisco home. Multiple fixtures showing low pressure often indicate a significant joint failure.
You may notice the pressure drop more during peak usage times. Water pressure issues can also affect appliances like dishwashers and washing machines, potentially reducing their efficiency.
Deciding Between a DIY and Professional Fix
Now you know how to identify whether or not you have a leak, so let’s dive into how to fix a leaking pipe joint. First, you must decide whether to attempt the job yourself or call a professional.
Minor leaks at accessible joints might be suitable for temporary DIY solutions, but this depends on your plumbing knowledge and the extent of damage.
Most joint issues require professional expertise to ensure a lasting repair. When making your decision, consider the location, severity, and type of joint.
Benefits of Professional Repairs in San Francisco
Professional plumbing repairs offer several key advantages for San Francisco homeowners.
Local experts understand the unique challenges of the city’s diverse plumbing systems. They bring specialized tools and experience to every job, and their knowledge of local building codes ensures that all repairs meet proper standards.
Professional plumbing repairs offer several key advantages:
- Expert diagnoses: Professional plumbers use advanced leak detection methods to pinpoint the location of any leak. They can identify underlying issues that might not be visible to untrained eyes. Their diagnostic tools can find problems within walls or under floors without causing unnecessary damage, and this precision saves time while preventing costly exploratory work.
- Proper tools and materials: Licensed plumbers carry specialized equipment, high-quality plumbing joint sealant for lasting repairs, and common replacement parts, reducing repair time. They know which materials work best for different types of pipes and joints. Their professional-grade tools ensure proper installation and sealing.
- Code compliance: When considering how to fix a leaking pipe joint, you need to remember San Francisco building codes and regulations. Plumbers stay updated on changing requirements and permits, allowing your home to pass inspection and ultimately helping you maintain property value. They understand how to modify older plumbing systems safely.
- Warranty protection: Licensed plumbers guarantee their pipe leak repair work. You receive documentation of all repairs and replacements with warranty coverage that provides peace of mind for future issues. Professional service records can also help with insurance claims if needed.
How To Fix a Leaking Pipe: The Prep Work
The next step in understanding how to fix a leaking pipe joint is getting prepared. Proper preparation prevents additional problems during the repair process.
Taking time to prepare can make the difference between a successful fix and a plumbing emergency. Following these steps helps protect your home from water damage during repairs:
Shut Off the Main Water Valve
Locate and turn off your home’s water shut-off valve before beginning any repair work. Open faucets to drain the remaining water from the pipes and relieve pressure.
Mark the shut-off valve location for future reference if it’s not easily visible. Test faucets throughout the house to confirm that the water flow has stopped completely.
Gather Your Safety Materials
Proper safety equipment protects you during plumbing repairs. Before use, ensure all materials are clean and in good condition.
Keep extra supplies nearby in case you need replacements. Having everything ready before starting prevents delays during the repair.
Essential safety gear includes:
- Safety glasses to protect your eyes
- Work gloves rated for plumbing work
- Clean rags for spills and drying
- A bucket for catching residual water
- Proper lighting for clear visibility
- Non-slip footwear
- Protective clothing
Clean the Area
Before we discuss how to fix a leaking pipe joint, you must clean up the leak. Thoroughly dry the leaking joint and surrounding area before attempting repairs, and remove any corrosion or debris that could interfere.
Determine Which Method You’ll Use
Assess the leak’s severity and location to choose the appropriate repair method. When planning your approach, consider factors like pipe material and joint type.
Research the best solutions for your specific situation. We will cover a few options below. Document the current pipe condition to track any changes during the repair process.
Five Methods for Fixing a Leaking Pipe
Water pipe failures occur for various reasons, so you need to choose the right repair method. Understanding each method’s strengths and limitations helps you make informed decisions.
Different approaches suit various types of leaks and joint materials. Here are a few popular options:
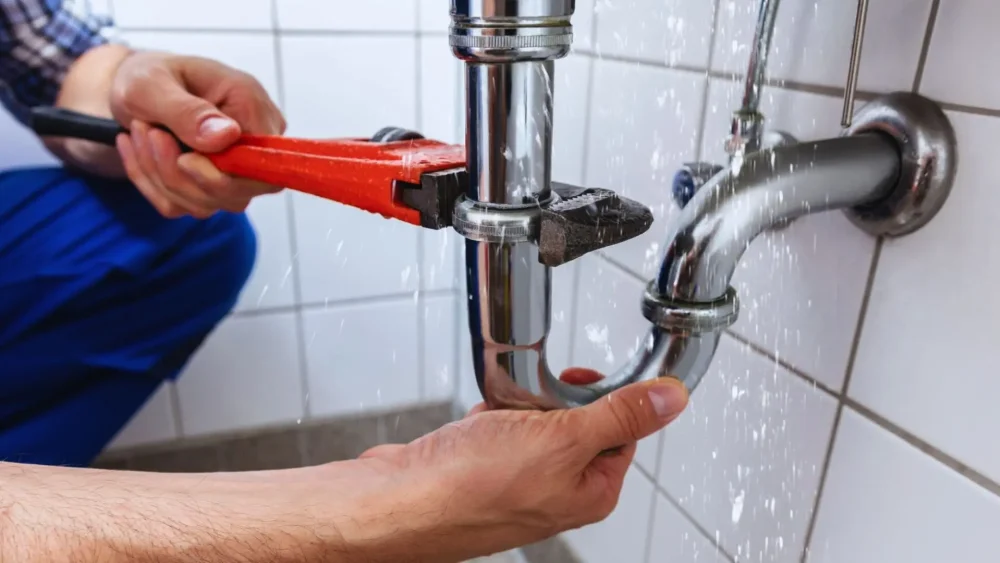
1. Tightening the Joint
Loose connections often cause joint leaks in San Francisco homes. Use an appropriate wrench to tighten loose fittings carefully, being careful not to over-tighten.
Check the joint from multiple angles to ensure even pressure. Monitor the repair site for several hours after tightening to confirm the leak has stopped.
2. Using Silicone Repair Tape
Self-fusing silicone tape provides a temporary fix for minor leaks when properly applied. This method works best on straight pipe sections with small leaks. The tape creates a waterproof barrier that can last several months.
Essential steps include the following:
- Clean and dry the area thoroughly.
- Wrap tape tightly around the joint.
- Stretch tape as you wrap for proper adhesion.
- Apply multiple layers for better sealing.
- Monitor the repair regularly.
3. Applying Epoxy Putty
Epoxy creates a strong temporary seal for various joint types. This method requires careful preparation and application. The repair strength depends on proper mixing and curing conditions.
Here are the basic steps:
- Mix the two-part epoxy according to the instructions.
- Apply directly to the clean, dry joint.
- Allow proper curing time before restoring water flow.
4. Replacing Worn-Out Washers
When learning how to fix a leaking pipe joint, you’ll find that many methods require a professional. Professional plumbers can replace deteriorated washers in various joint types. This repair requires specific tools and expertise to complete correctly.
5. Replacing the Entire Joint
For severe damage, professionals must complete a full pipe replacement process. This comprehensive repair addresses both current and potential future issues. A replacement requires expert knowledge of local plumbing codes and proper installation techniques.
Your Best Option: Calling a Local Plumber for a Permanent Leak Repair in San Francisco
Professional plumbers understand local building codes and common plumbing issues in San Francisco’s diverse architecture. They can implement effective water damage prevention strategies while performing repairs. Their expertise with various pipe materials ensures appropriate repair methods.
Trust Works Plumbing for Expert Pipe Joint Repairs
Now you understand how to fix a leaking pipe joint and recognize when professional help becomes necessary. We specialize in comprehensive pipe leak repair services throughout San Francisco.
Learn more about our advanced maintenance services, including your answer to the question, “When do pipes need hydrojetting?”
Contact us at Works Plumbing today for expert help with your leaking pipe joint in San Francisco.
