If you’re like most homeowners, you don’t give much thought to your water heater until it stops working. However, it’s necessary to drain your water heater occasionally. Once every one to three years is recommended. This helps to remove sediment buildup and allows your water heater to work more efficiently so that you can save money on your utility bills. If you’ve never flushed your water heater before, you may benefit from the step-by-step instructions below.
Turn Off the Power and the Cold Water Valve
Before you get started flushing your water heater, you need to kill the power to it. If your water heater runs on electricity, you’ll want to shut off the circuit breaker to cut the power to the device. If your water heater runs on gas, turn the thermostat and gas valve off so there’s no longer any fuel going to your equipment.
You’ll also need to turn off the valve for the cold water going into the system. You can locate this valve at the top of the water heater. Typically, there are two water lines, one with cold water going in and another with the hot water coming out. The cold water line should have a valve with a blue handle to differentiate it from the hot one, which ought to be red. If both valves are the same color, look at the top of your water heater to see what it says next to where the water line enters it.
Let the Water Cool Down
The water inside of your water heater is scorching hot. You don’t want to mess around with trying to drain it while it’s heated to this degree. It could cause injury to you or harm to the tools you’ll use to drain the equipment. Instead, you should let the water in your tank cool down for at least an hour. If you have a larger water heater, meaning one with more than a 36-gallon capacity, you’ll likely need to give it about two hours for the water to cool down completely. Waiting overnight wouldn’t be a bad idea.
Turn Your Faucets On
You’ll want to turn on the hot water faucets at a couple of your sinks. This will help to ensure that you don’t create any sort of vacuum when you go to drain your hot water heater. It’s perfectly normal for water to come out of your faucets for a little while during this process.
Get Your Hose Hooked Up
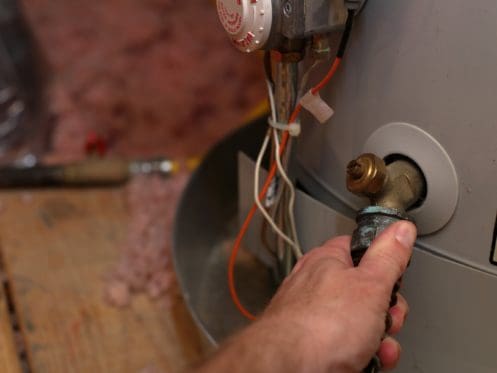
Next, get your garden hose out. You’ll want to tightly screw it onto the drain valve at the bottom of your water heater. The other end of your hose should be run into a floor drain or a heat-resistant bucket. It can be particularly helpful to have a shortened hose that is cut to the correct length to reach your floor drain. This can help avoid excess travel time for the water and reduce your risk of tripping over the hose when flushing out your water heater.
Be sure to put some sort of screen at the hose’s exit point to collect any loose sediment so that it doesn’t clog your floor drain. An old kitchen colander works well for this. If you’re using a bucket, be sure to dispose of the sediment-filled water outside. Don’t just pour it down your household drains without filtering out the sediment.
Let the Water Flow Out
Go ahead and turn your water heater’s drain valve on. Depending on the type of drain valve you have, you may need to use a flat screwdriver to toggle between the “On” and “Off” positions. Let your equipment drain until the water coming out of it is completely clear. Double-check to make sure there’s no sediment left in it. A wet/dry vac can be used to suck out any debris
Wrap It All Up
Once your water is coming out clear, it’s time to put everything back to normal. You’ll want to start by turning the drain valve off and disconnecting the hose. Turn the cold water valve at the top of your water heater back to the “On” position. You’ll also need to turn the circuit breaker or the thermostat back on, depending on the specific type of system that you have.
Excellent Water Heater Services
Works Plumbing is here for all of your water heater services in the Pacifica, CA, region. We also provide drain cleaning, hydro jetting, camera inspections, leak detection and plumbing installation and repair for kitchen equipment, toilets, showers, water lines, sewage lines and gas lines. Give us a call today to get the professional plumbing assistance you need.